
In this guide, I'll walk you through the process and materials I used to create my custom electric standing desk.
I first experienced the benefits of a standing desk while renting one at a local co-working space, and it truly changed how I worked. As a designer, you'll know that spending countless hours hunching over a computer can cause ongoing back and neck problems. For me, switching to a standing desk made a noticeable difference and hugely reduced those issues.
After moving from the co-working space back to home, I decided to build my own standing desk for two main reasons: first, I needed it to fit a specific nook in my living room that was just over one metre wide; second, I wanted a wood finish that would closely match the light Rimu wood features in the room.
Since I couldn't find any ready-made desks that met both criteria, I took matters into my own hands and built my desk using custom-cut plywood and an electric standing desk frame.
Note – because I live in in Aotearoa New Zealand, the links in this guide go to companies that trade here (like Mitre 10 and Bunnings), but I'll provide enough details so you know what to look for in similar items. See further down for my shopping list.
Gathering the pieces
Finding the frame
First up, I needed to find a standing desk frame that would fit my nook. Here’s what I needed:
- A minimum width of less than one metre to fit the space and allow enough room to attach the frame to the desktop wood.
- A frame with a control panel that could save height settings – I didn't fancy spending time adjusting the height every time I stood up or sat down.
- A black frame to match the other black elements in the room.
After some searching, I found the Levede Motorised Standing Desk Frame at Onceit, which ships free from Australia to New Zealand, and it ticked all the boxes without breaking the bank. (If you're in Australia you can buy this frame at Dick Smith).

Finding the Desktop Wood
Next, I needed to find the wood for the desktop. I went to Mitre 10 and found an 18mm thick piece of plywood. It was pre-cut to 1.2 metres long x 60cm deep.
The depth was perfect because it was bigger than the 55cm frame, but it was too wide for the nook – so I asked a helpful staff member at Mitre 10 to trim it down to one metre using their cutting machine to make sure I got a straight edge.

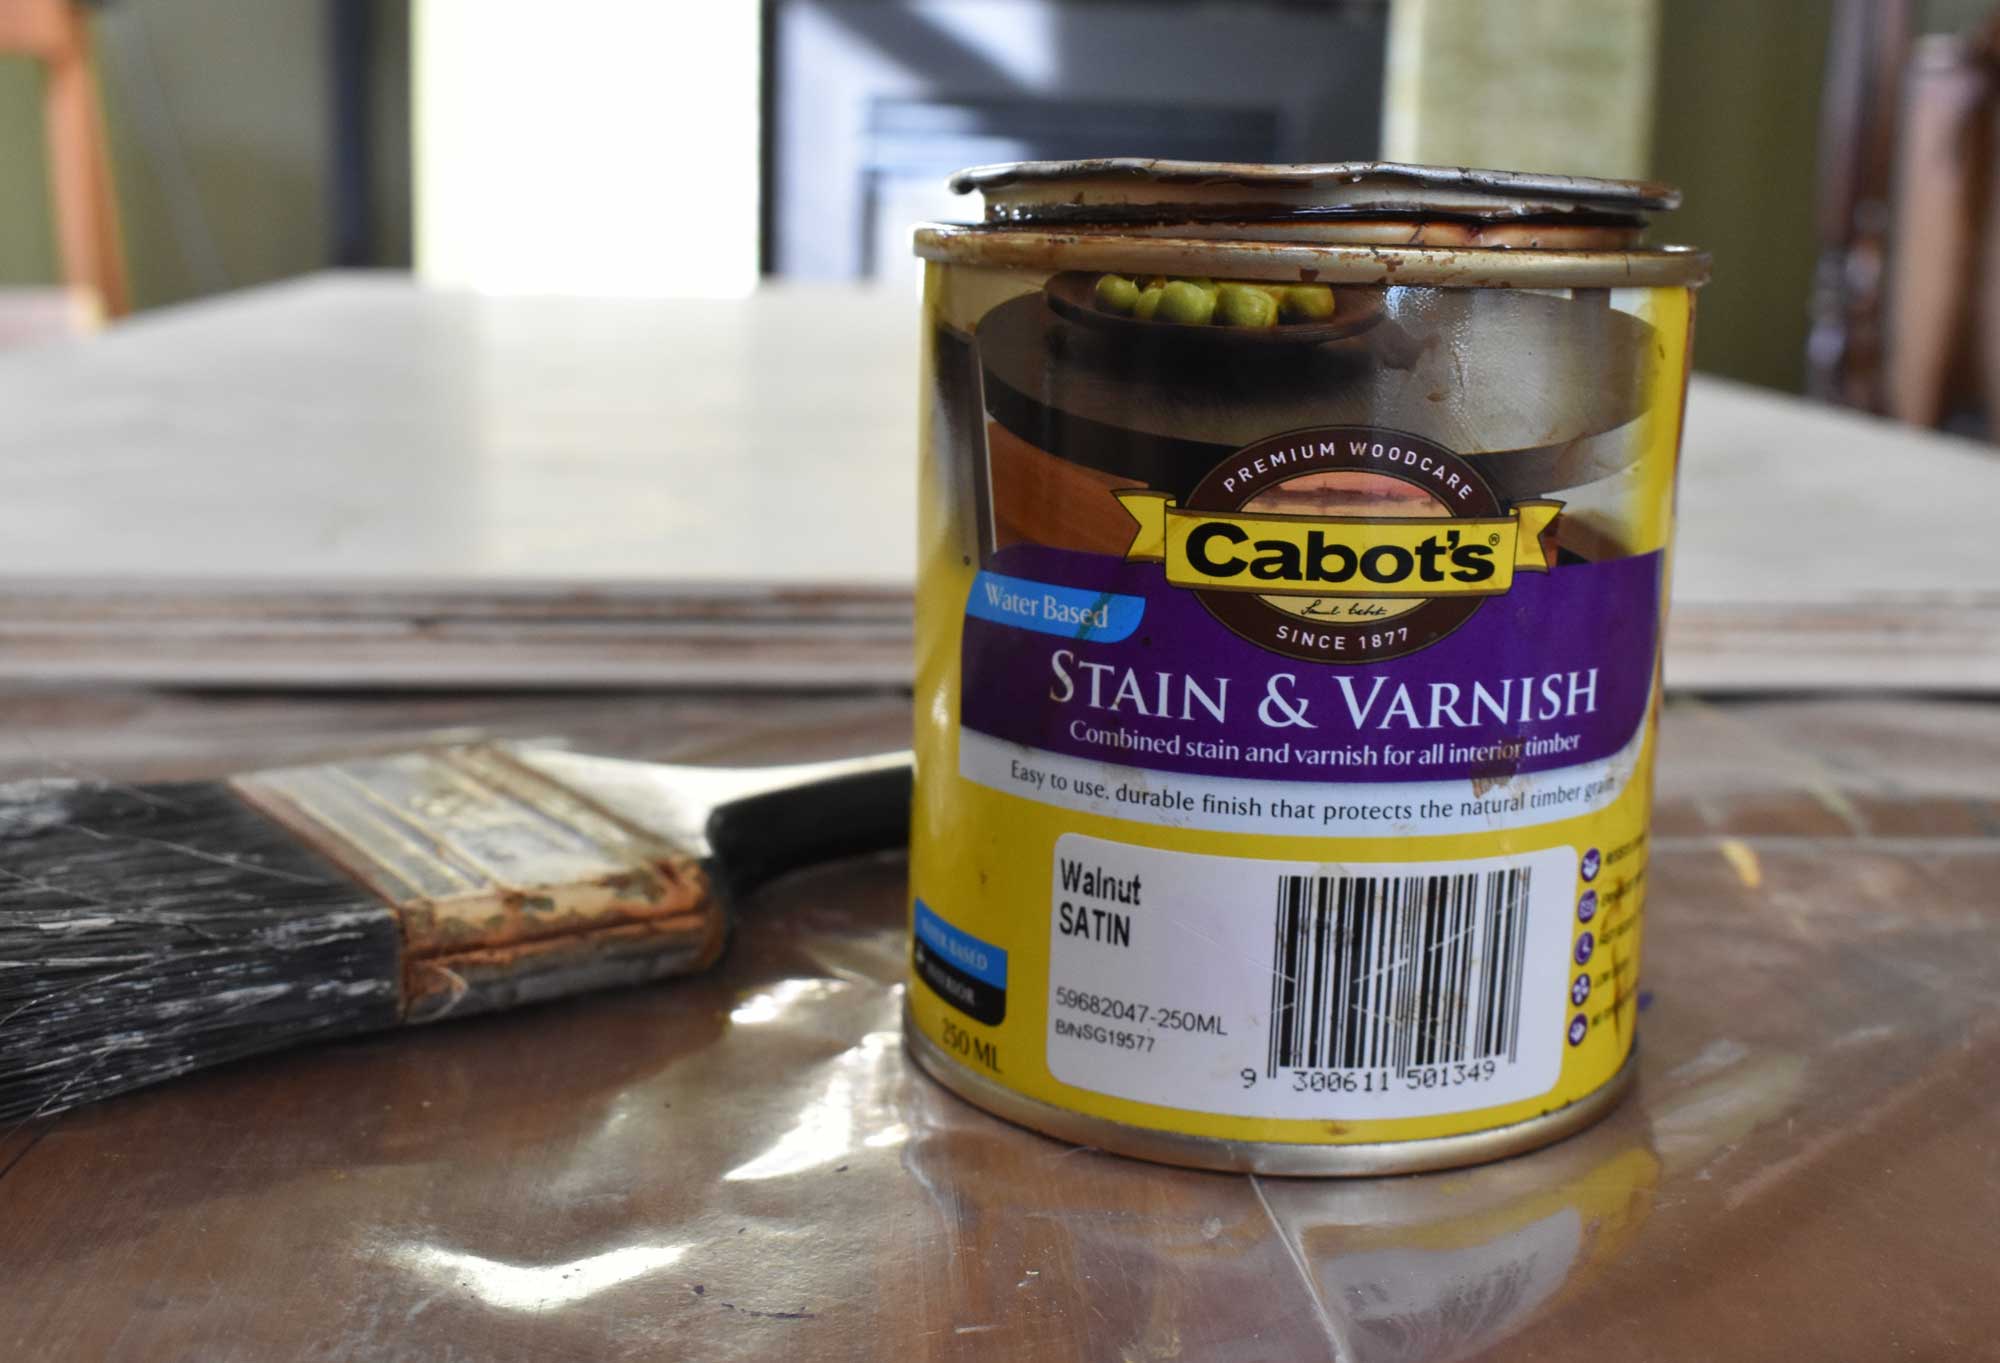
Since I didn’t want the plywood look and wanted to match the light Rimu wood features in my house, I looked for a suitable stain. At Bunnings, a staff member recommended the Cabots Walnut Stain and Varnish, which combines both stain and lacquer. He had used it for personal projects and said that after three layers it looked pretty close to the light Rimu wood that's common in our old character homes in Aotearoa. I liked that it's also a 2-in-1 product, so I wouldn't have to buy and apply a stain and varnish separately.
Finding the screws
Next, I looked for the screws needed to attach the frame to the desktop. By reading the Levede frame instructions, I could see that I would need to use three types of screws; one type for the frame and power box, another type for the control panel, and another type for the frame's centre piece.
Note – The Levede Frame I bought came with a set of bolts, which are perfect for putting the frame together, but not suitable for screwing the frame onto a custom wooden desktop (ie not their desktop, which is sold separately). Below I detail the screws I chose specifically for the Levede frame while keeping in mind my desktop plywood is 18mm thick. If you have a different frame and desktop thickness, you will need to use the instructions and a bit of simple math to figure out what screws you need at what length.
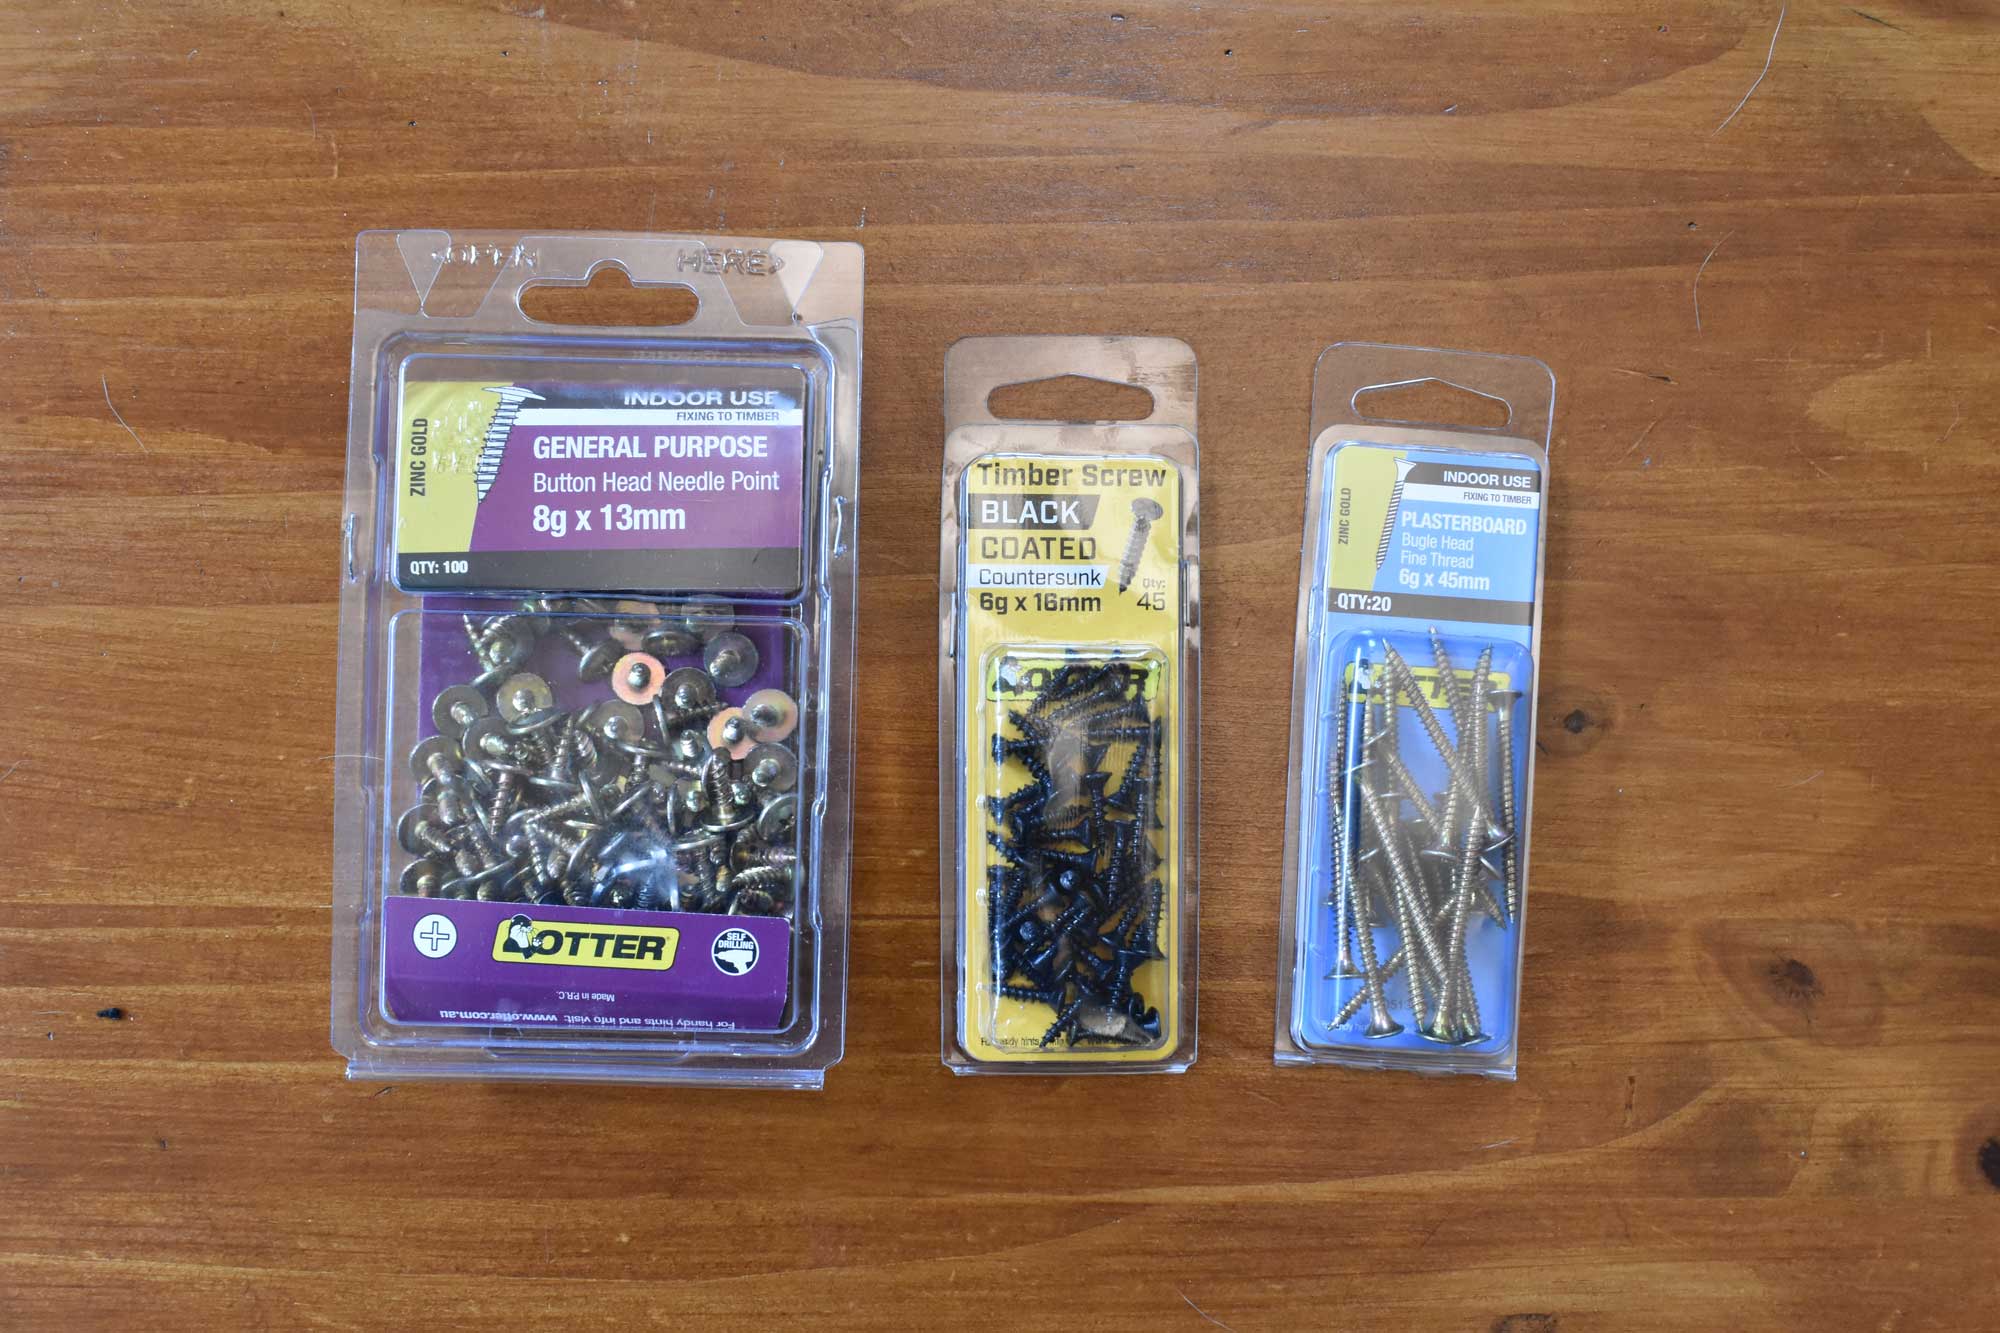
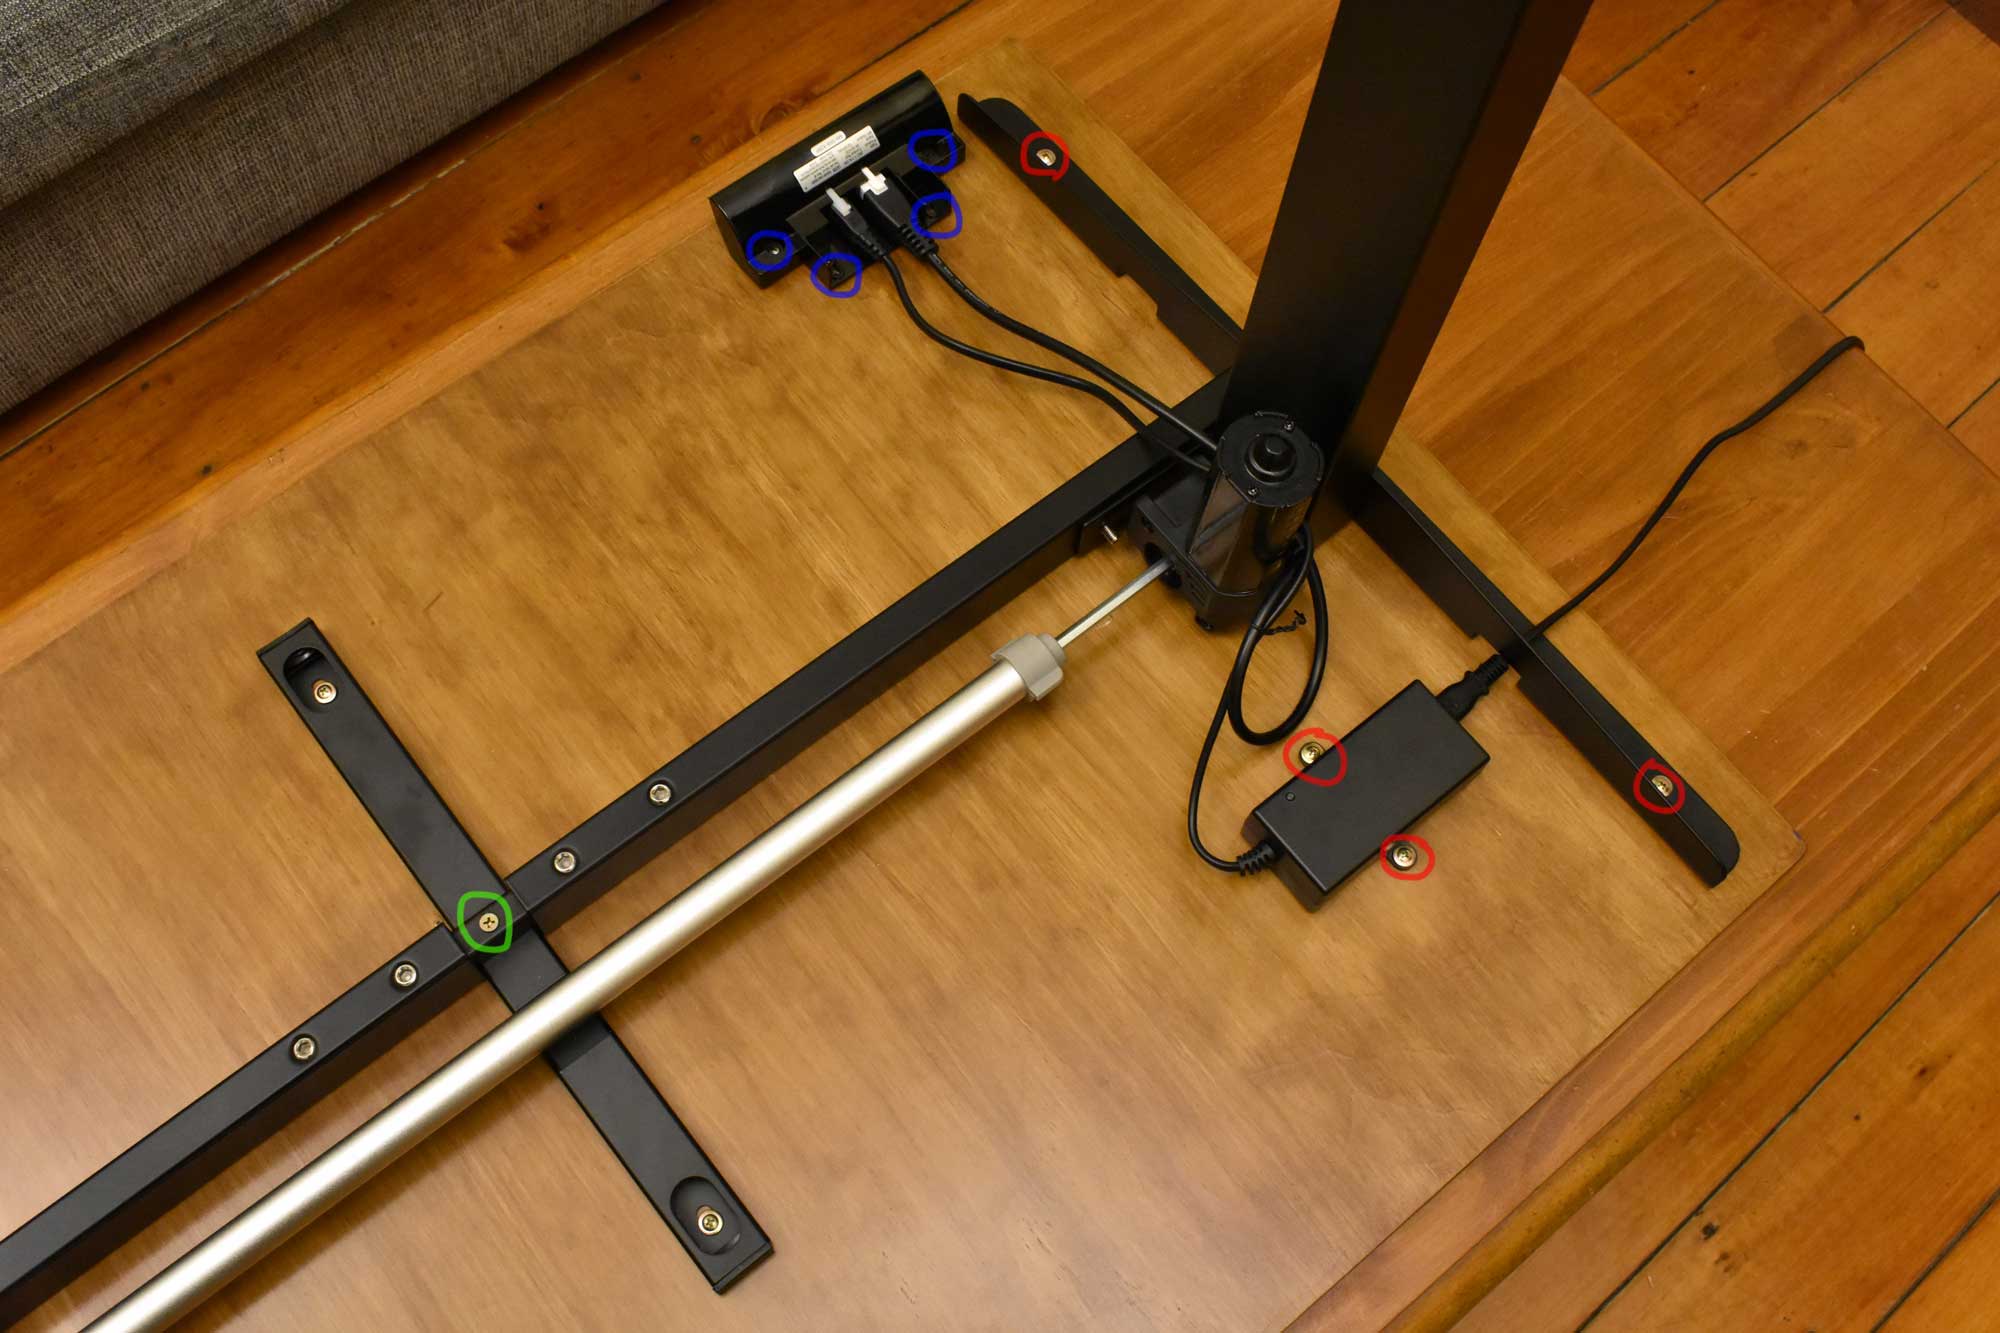
Frame Screws (x12): For fixing the frame to the desktop wood, I chose 8g x 13mm (long) button head screws, making sure the screw length was smaller than the desktop wood thickness of 18mm. The button head was also important so they wouldn't slip through the frame holes.
Control Panel Screws (x4): For attaching the control panel to the desktop wood, I chose 6g x 16mm screws. They needed to be smaller than the frame screws so they would fit into the plastic screw holes of the control panel.
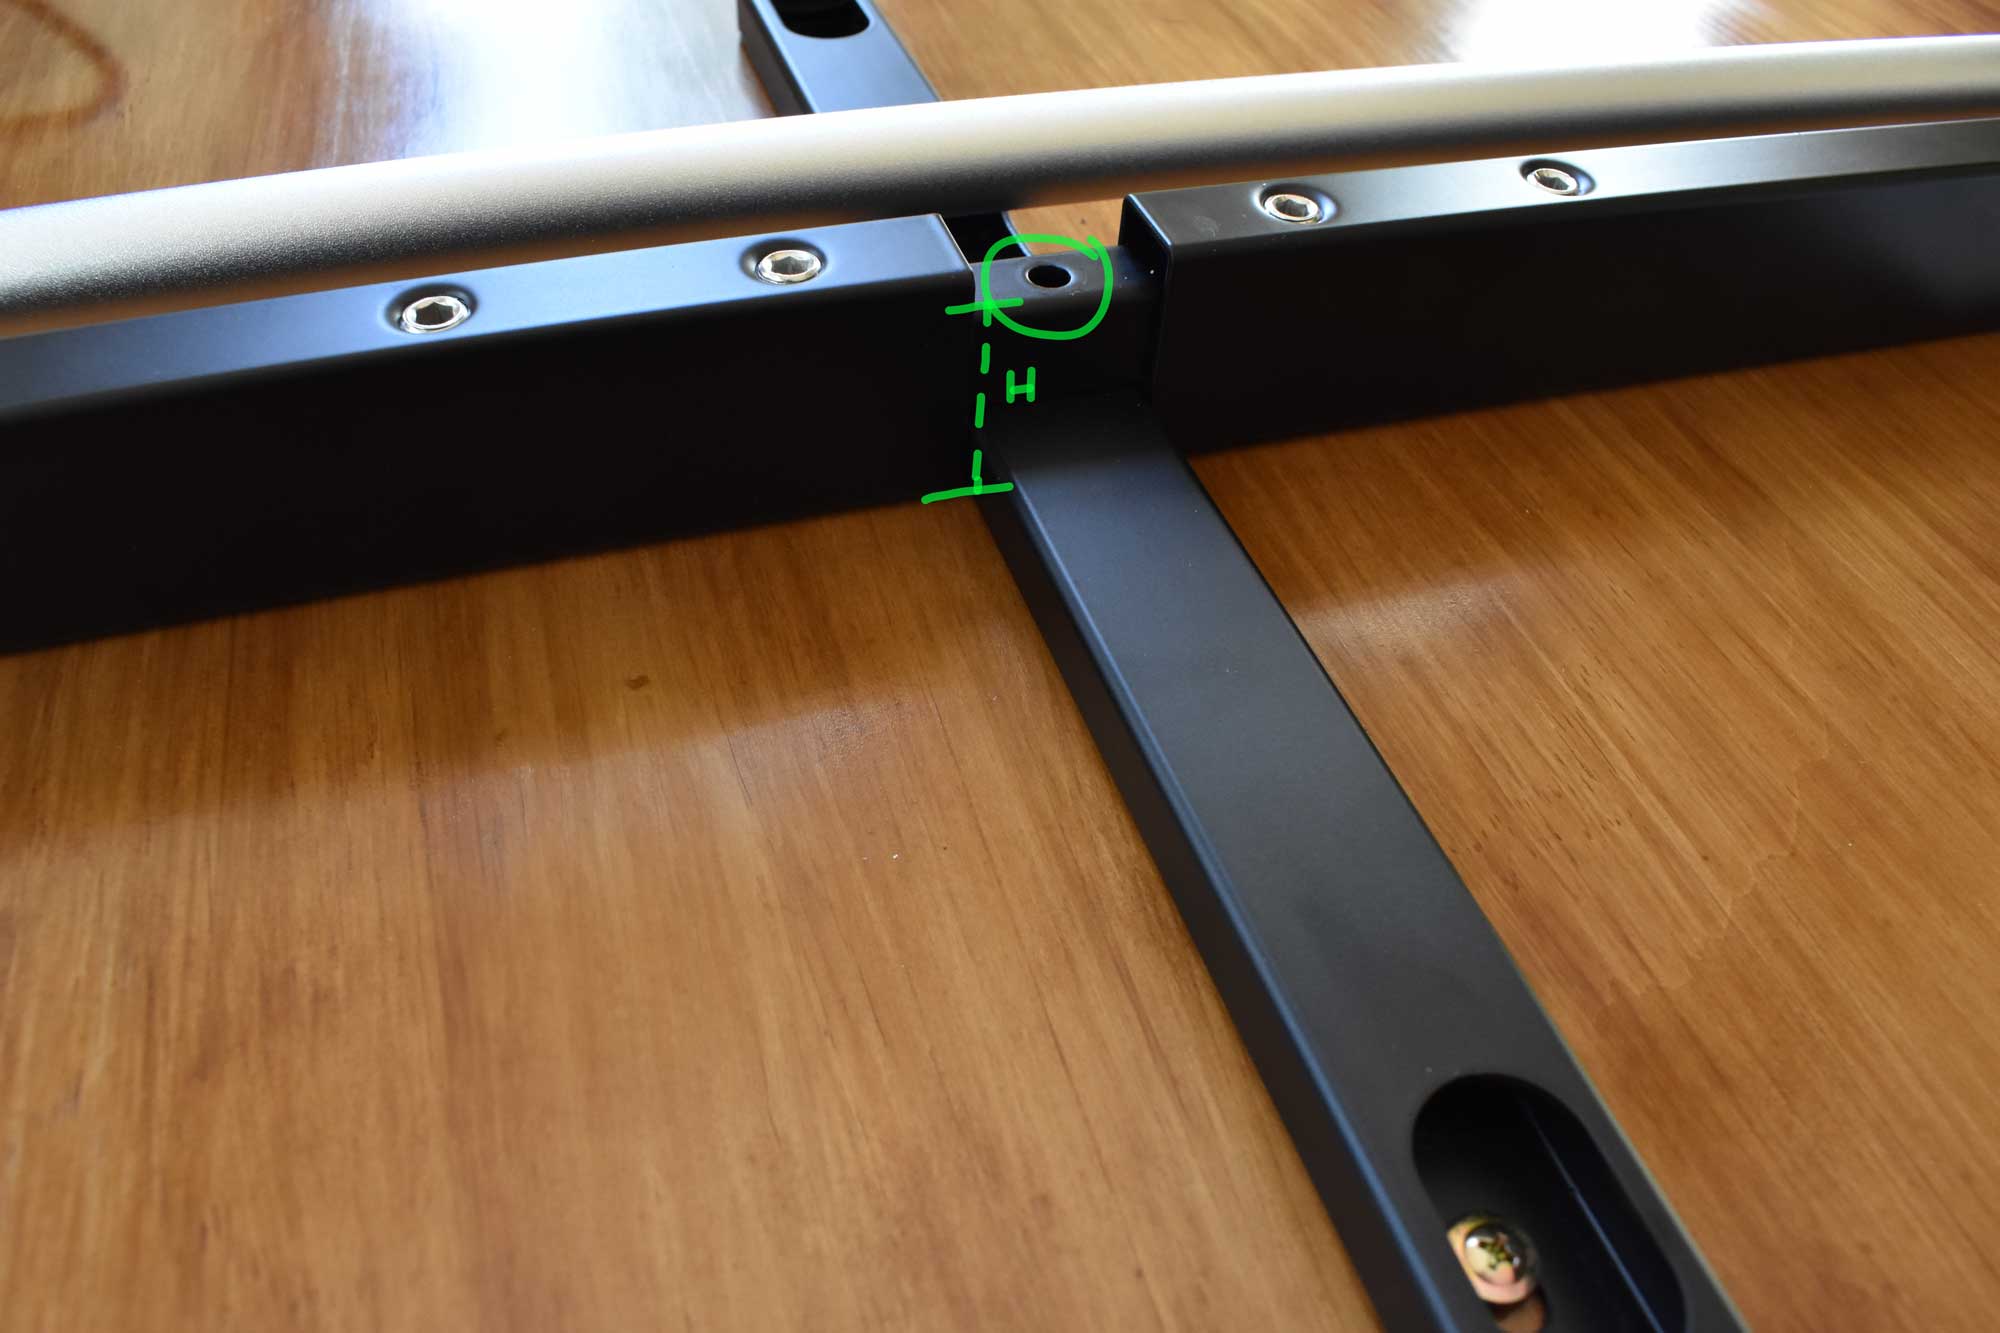
Frame Centre Piece Screw (x1): I needed one longer screw for fixing the centre piece of the frame to the centre of the desktop wood. I knew I needed a 45mm long screw by adding the height (H) of the assembled centre piece to the 18mm desktop wood thickness, then subtracting a few mm so it wouldn't poke out the other side.
Finding the tools
Now to get together a few essential tools.
A Phillips screwdriver for screwing in the screws, and a measuring tape to help get the frame evenly spaced on the desktop wood.
Sandpaper: 80 grit to smooth out the corners, edges and sides of the desktop wood, and 240 grit for sanding between stain coats, plus a sanding block to help me sand evenly.
Paintbrushes to apply the stain; a larger one for staining the top and bottom of the desktop wood and a smaller one for the sides.
Plus a couple of cloths to wipe off the sanding dust and clean up any drips.
Now I had everything I needed for the project.
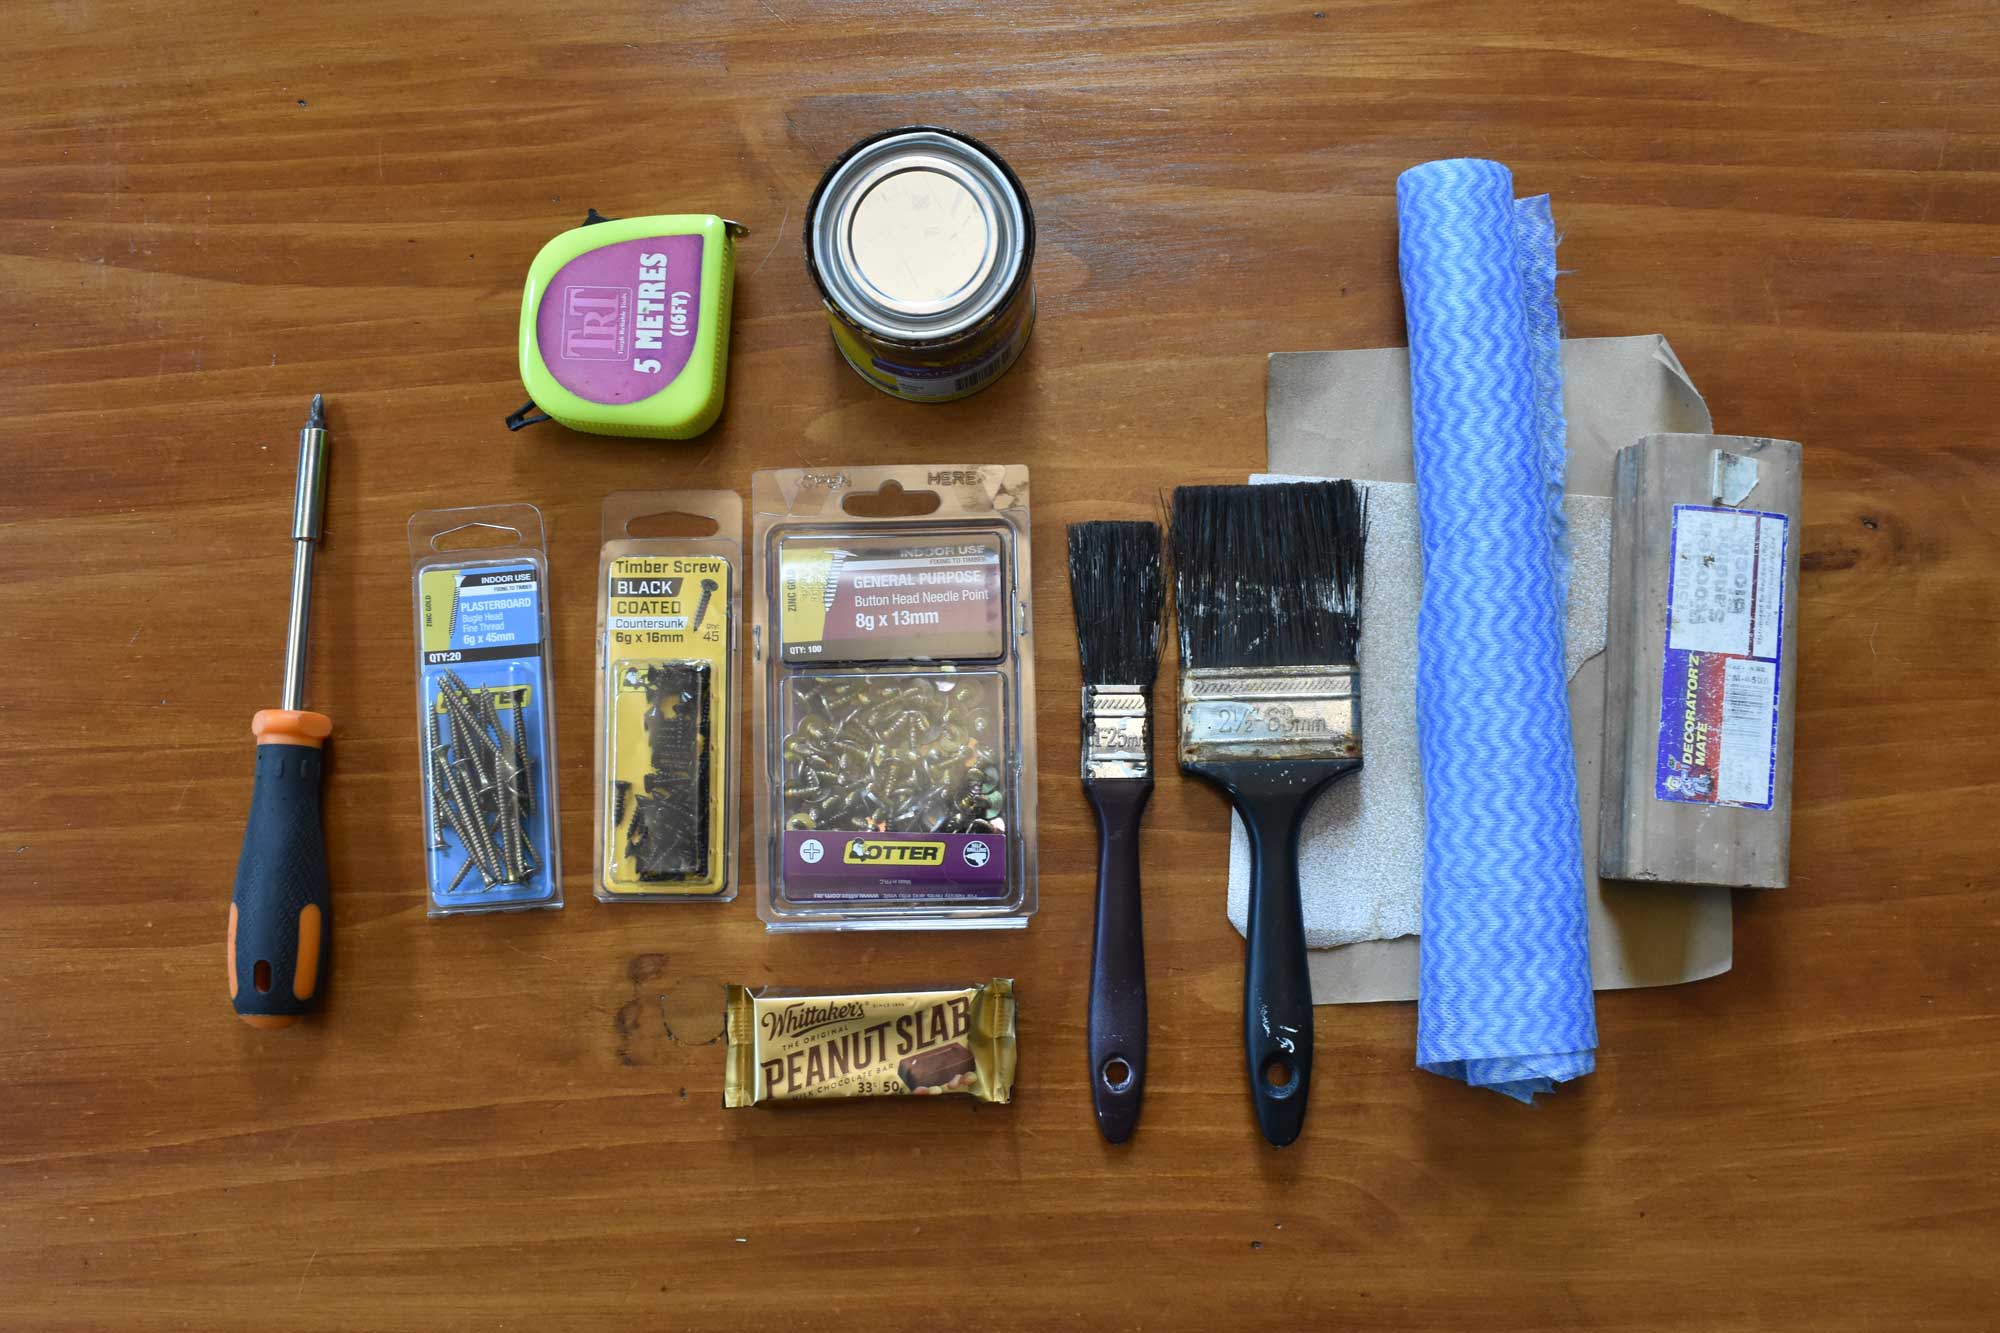
Here's a breakdown of the materials and tools used:
Shopping list
- Motorised Standing Desk Frame: Onceit (NZ) or Dick Smith (AUS)
- Desktop Wood: Plywood 1.2m x 60cm x 18mm
- Stain and Varnish: Cabots Walnut Satin
- Frame Screws: Otter 8g x 13mm (x12)
- Control Panel Screws: Otter 6g x 16mm (x4)
- Centre Piece Screw: Otter 6g x 45mm (x1)
- 80 Grit Sandpaper
- 240 Grit Sandpaper
- Sanding Block
- Large & Small Paint Brushes
- Phillips Screwdriver
- Measuring Tape or Ruler
- Dry Cloths x2
In total this cost me $429.77 NZD, but I already had several items in my toolshed: sandpaper and sanding block, paintbrushes, screwdriver, measuring tape and cloths. This may be a business expense for you, so keep the receipts as you might be able to get a tax deduction.
Preparing the Desktop Wood
Before attaching the desktop wood to the frame, I prepared it by sanding it and then applying the stain & varnish.
Sanding the Desktop Wood
I rounded off the corners, edges, and sides with 80 grit sandpaper to avoid cuts or splinters when using the desk.
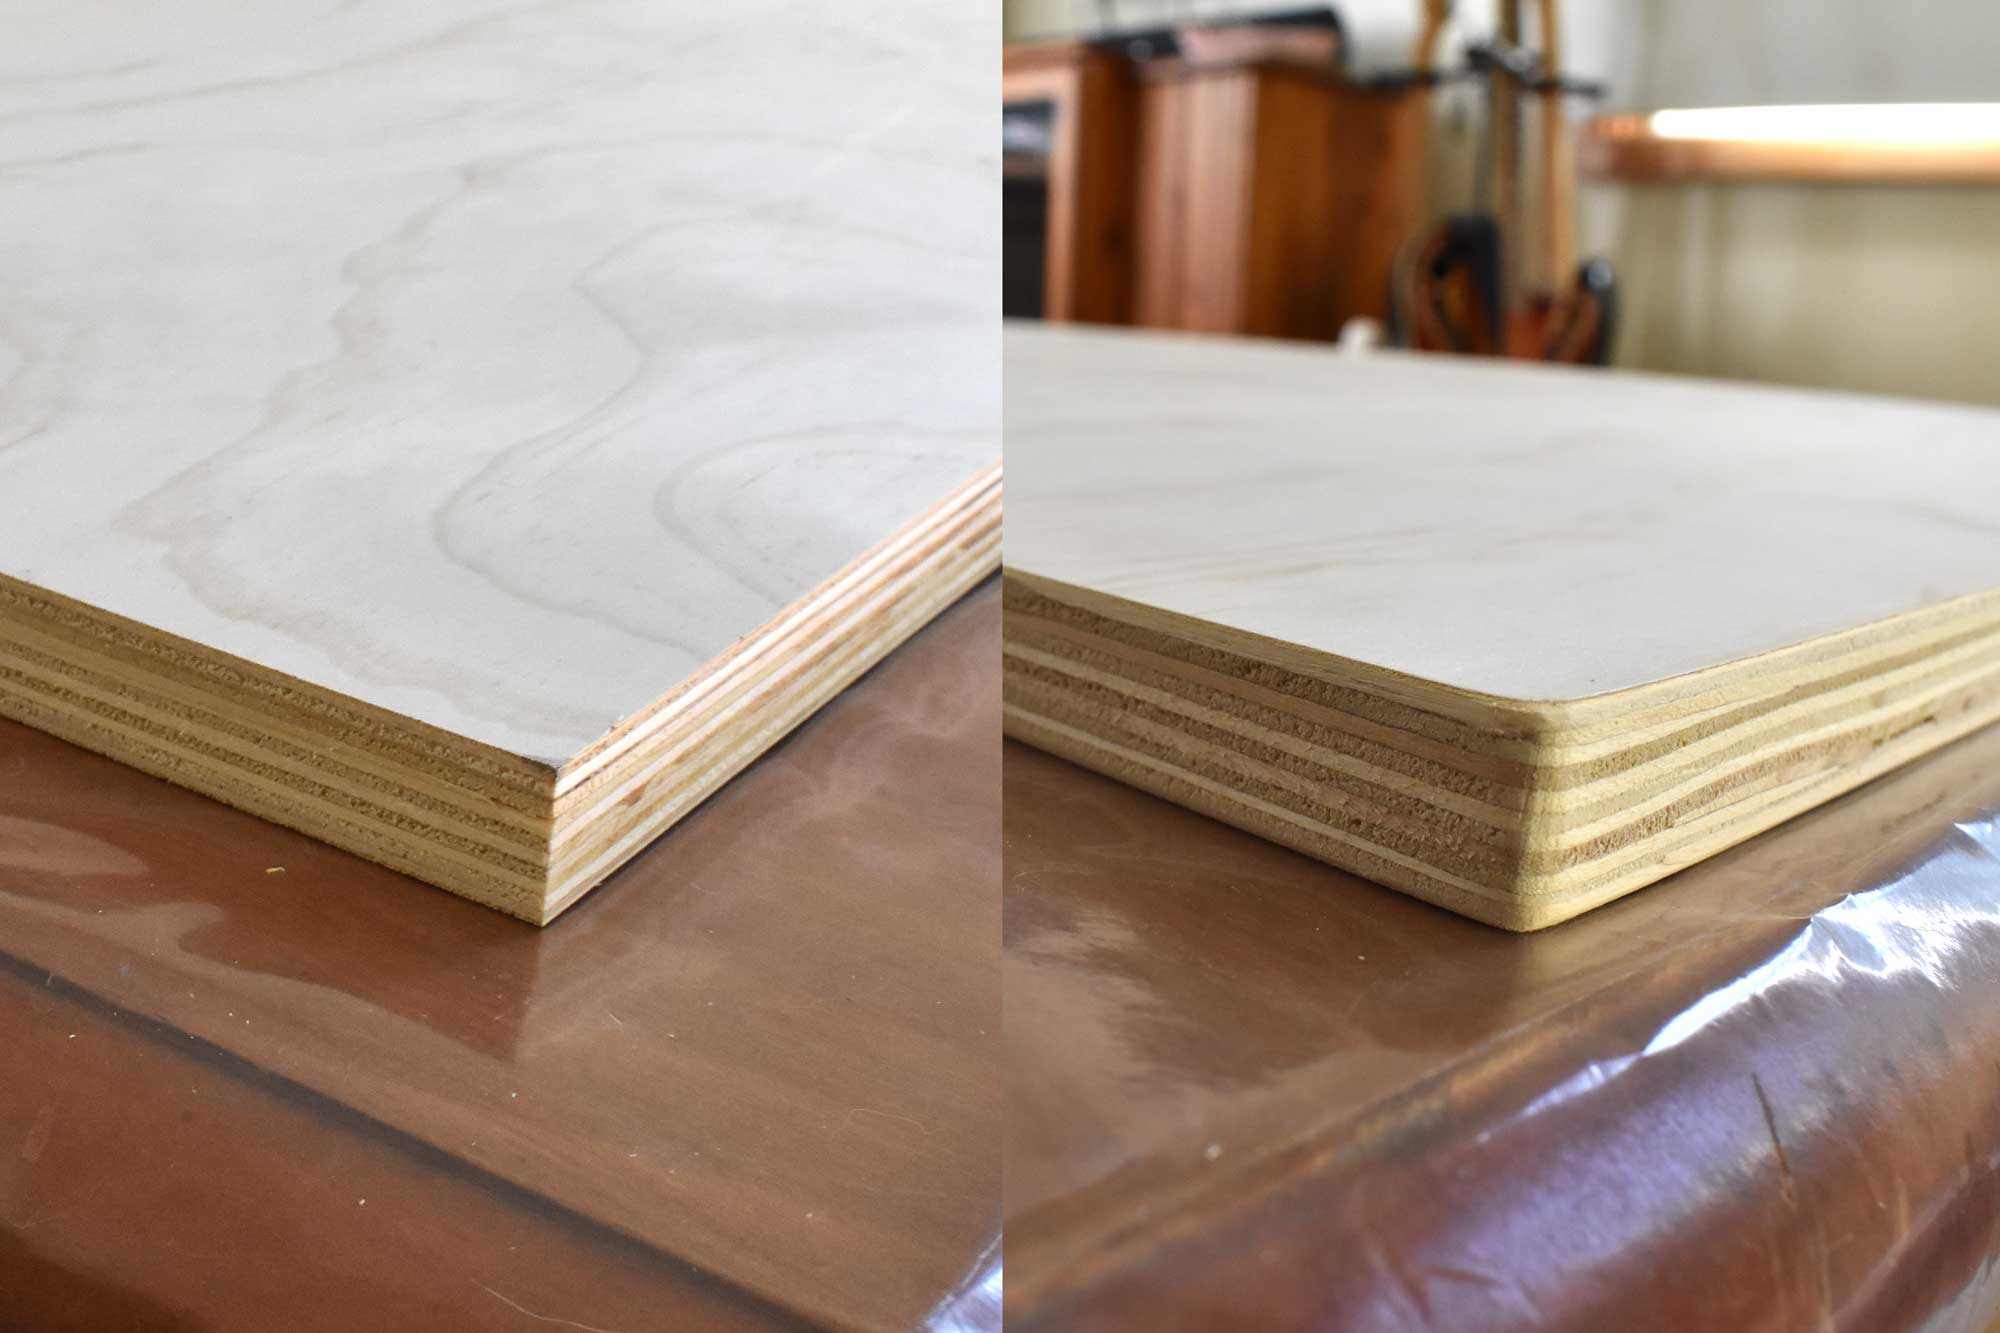
Once that was done, I sanded the top and bottom of the desktop wood with 240 grit sandpaper to remove any loose dust and grime so the stain & varnish would apply smoothly. Then, I used a dry cloth to dust the wood down until it was clear and I couldn't see any dust particles flying off.
Now the wood was ready for staining.
Note – Make sure to sand with the grain! If you don’t want to stain the plywood, you should still sand it as above and apply some clear matte varnish on top to protect the desktop wood and make it easier to clean.
Staining the Desktop Wood
With my larger paintbrush, I brushed the stain onto what I had chosen to be the underside of the desktop wood. I aimed to brush long, even strokes from edge to edge, and brushed with the grain. I wasn't too worried if I didn't get it perfectly even, because I knew the next couple of coats would help to even it out.
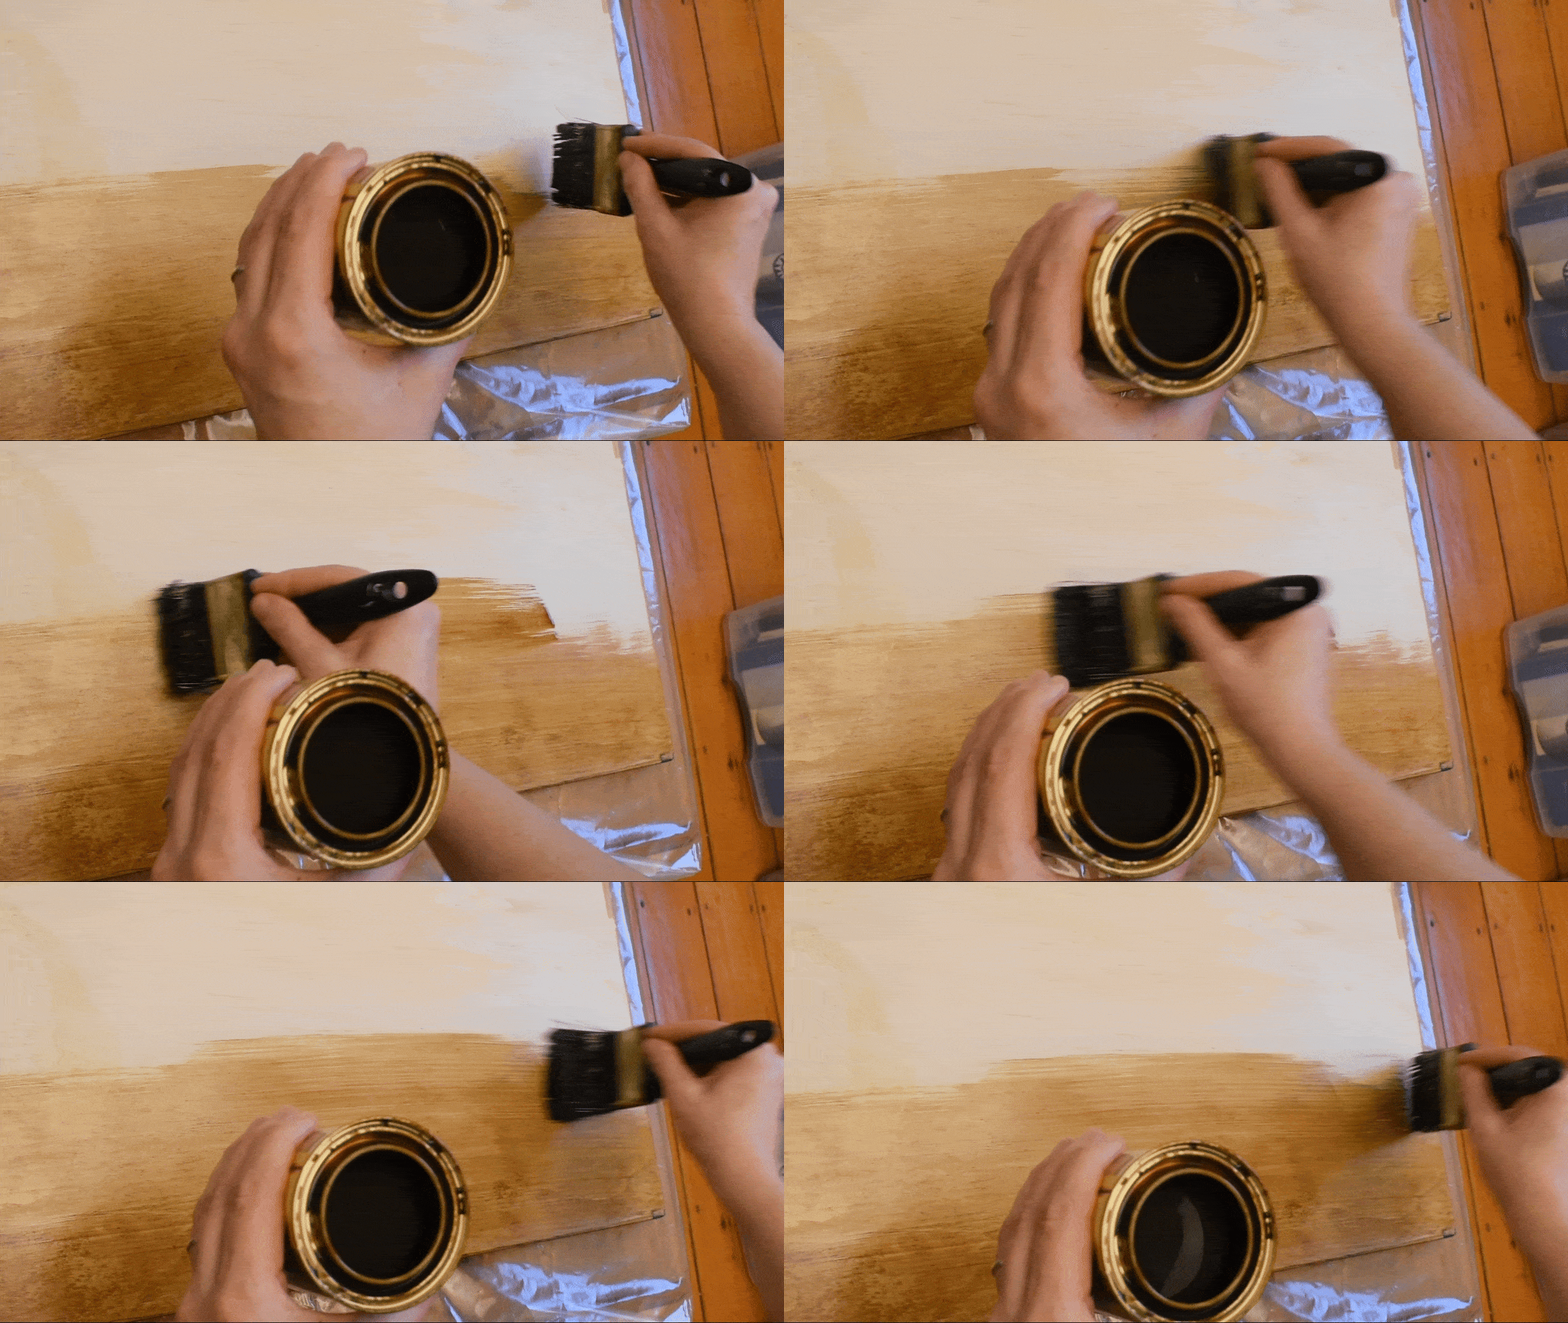
Following the instructions on the Cabot's can, I let the first coat dry for two hours. Then, I gave the stain a light sanding with the 240 grit sandpaper to smooth it out, and wiped off the dust with a cloth – ready for the next layer of stain.
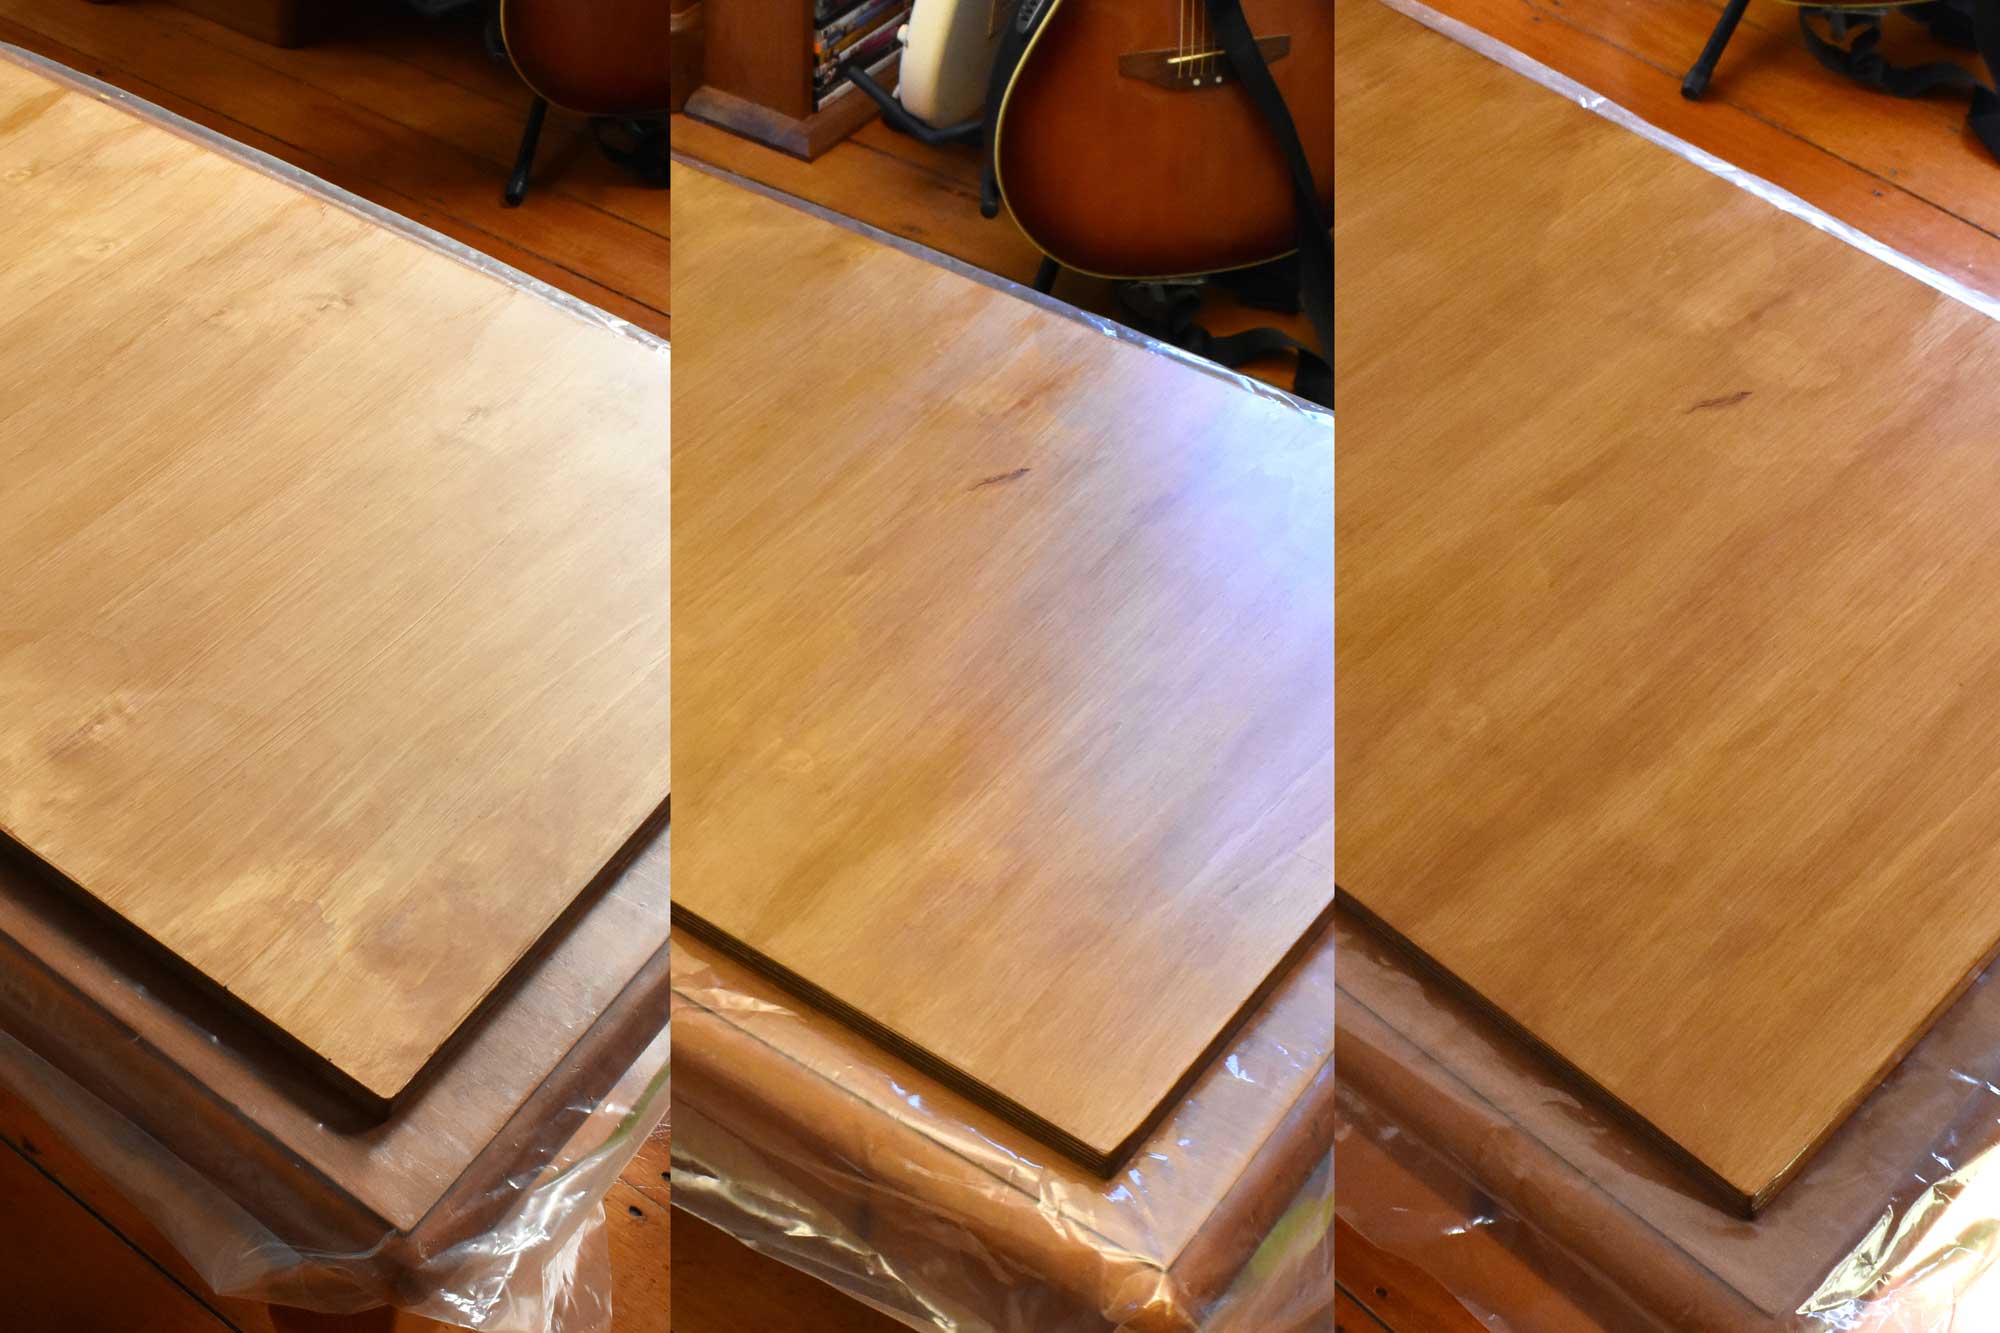
Once I’d painted the second layer and it was dry, I sanded it and then brushed on the final layer.
After completing the three layers on the underside, I flipped it over and repeated the process for the top of the desktop wood and the sides. I used my larger brush for the top, and my smaller brush for the sides, and had a cloth handy to wipe the underside in case if any stain escaped underneath.
Note – I started with the underside of the desktop wood so I could get used to the viscosity of the stain and how it applied with the brush, without worrying about making mistakes since I knew I wouldn’t see them. If you aren't confident about brushing on the stain, you could do the same – or practice with an off-cut piece of wood.
Assembling the Standing Desk
Finally, it was time to put the frame together and attach it to the desktop wood. I won't bore you with the step-by-step instructions specific to the Levede frame, as these are included when you buy the product (and if you have a different product your instructions will be different).
However, here are some tips for assembly:
- Decide what will be the front and the back of the desktop wood before you flip it over to screw in the frame, so you get the control panel in the right place on the front.
- Assemble the entire frame first, then place it upside down on the underside of the desktop – without screwing anything in. This will allow you to make sure everything is in the correct position before making it permanent.
- Similarly, before screwing in the power box and control panel, make sure to connect all cords that go from the power box to the control panel to make sure all the leads will reach.
- There's no need to pre-drill holes because the screws have needle points. You can just push the screws into the wood with a bit of pressure and then use your screwdriver to screw them in.
In the image below I've circled which screw types go where. Red = the frame and power box screws, green = the centre piece screw, and blue = the control panel screws.
My Finished Standing Desk
Wohoo – A standing desk perfectly suited for my space. Hopefully, I'll be saying goodbye to my sore back and neck!
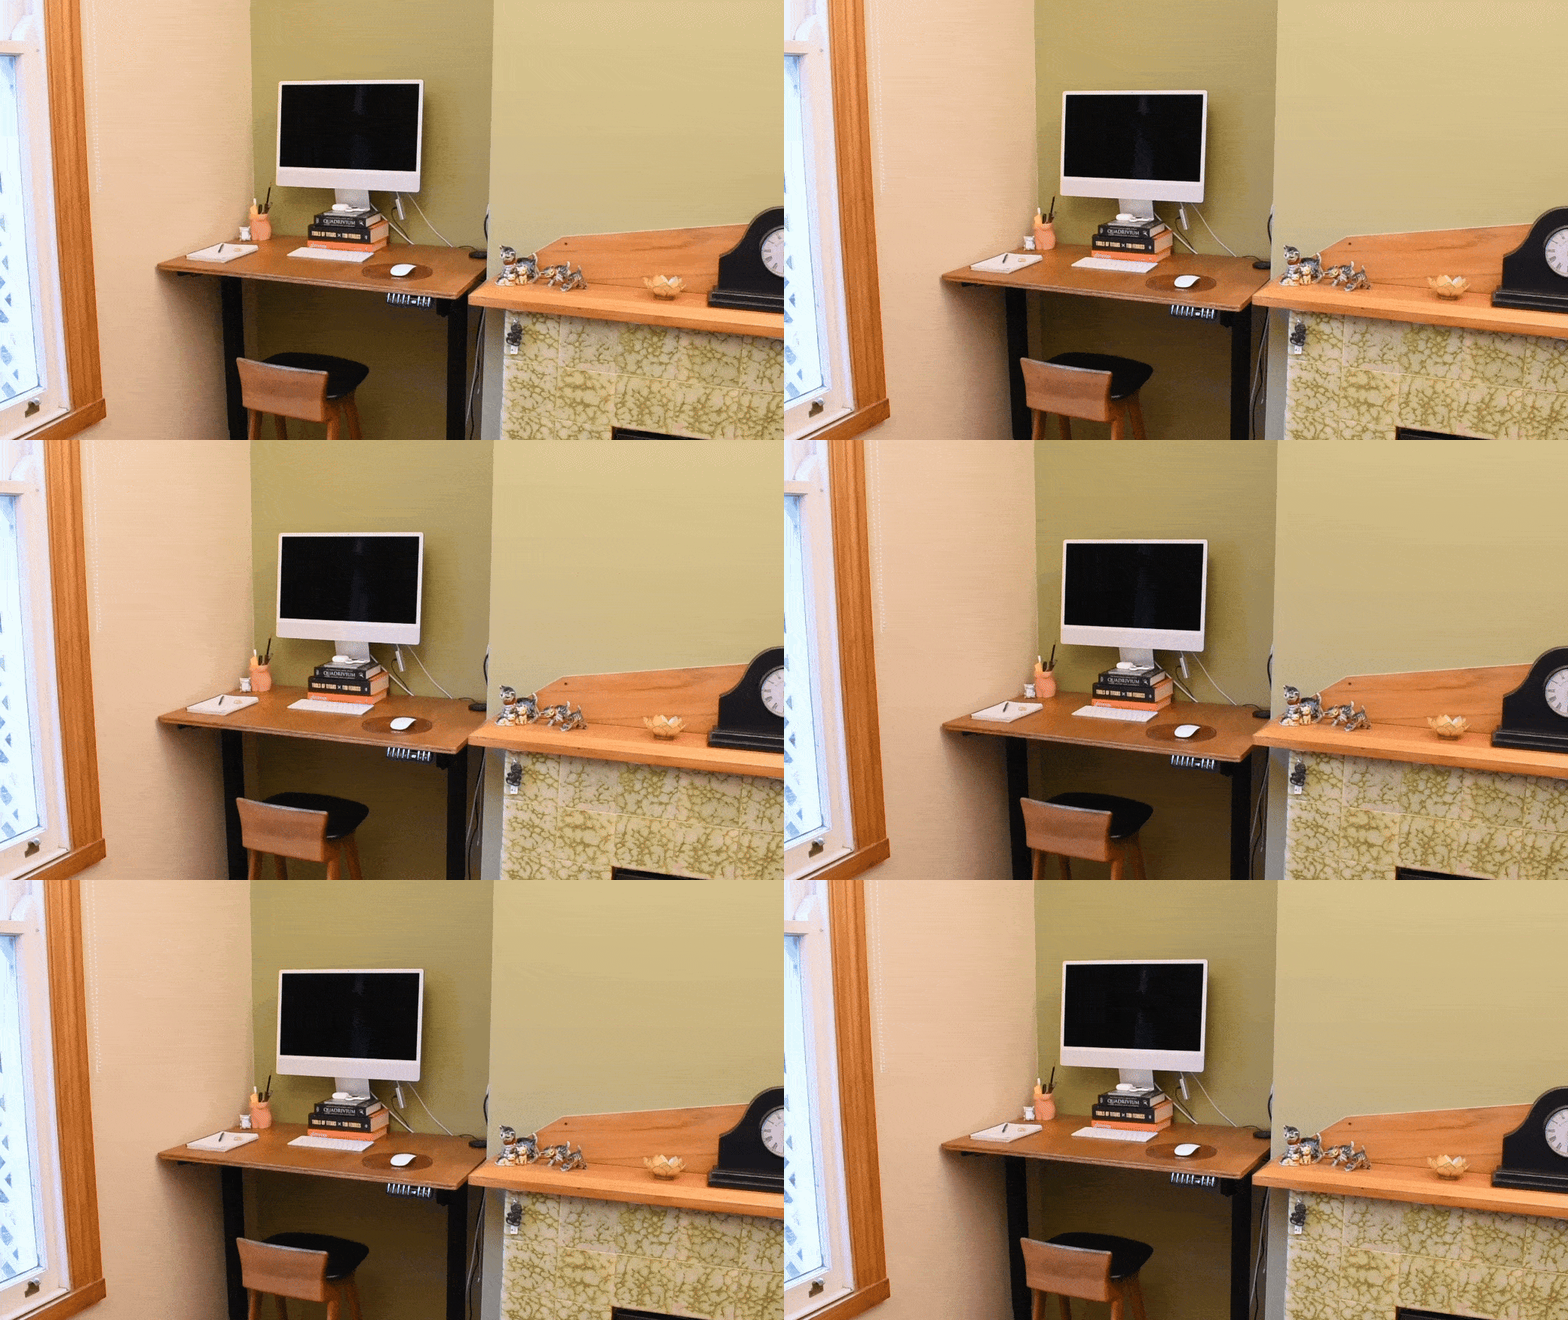
If you decide to take on this project, I’d love to see your final setup! Feel free to email me a picture and share the experience of how you found building your own custom standing desk.
Please note that while I’ve done my best to provide you with detailed information, it’s important to double-check everything. I can't be held responsible for any mistakes or issues that arise during your project.


